The Database Setup
Quick Base is a cloud-based relational database management system that allows for very fast development of relational databases and associated forms, reports, notifications and subscriptions.
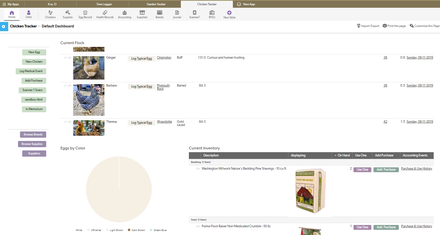
As a way to learn more about relational databases and Quick Base, I decided to make an app for tracking my flock of chickens and supply inventory. Chicken-wise, there is a record for each chicken with vital stats as well as linked fields to other tables that contain health records and egg production records. Additionally, the app tracks supply inventory such as feed and bedding, and includes quick one-click ways to add and use inventory items. Inventory count is always up-to date, and a linked table of suppliers is handy for quicker data entry and more precise record-keeping and accounting.

Egg records are created by manually creating a record or by tapping a “Log Typical Egg” button, which creates a record on the egg table for that chicken, using pre-defined “typical” data, which is set per-bird or, if not entered, uses a value from the breed record that is linked to the chicken. I wanted to figure out a way to automatically log the chicken’s egg production, and decided to start with the problem of identifying the chicken in the nestbox. While this likely wouldn’t solve the problem of knowing if an egg was laid or not, it was a good start towards an automated egg logger.
The RFID Setup
I didn’t know much about RFID when I started, but quickly learned that the most important thing to look for when purchasing readers and scanners is to look at the frequency that is used, and make sure they match. RFID comes in low frequency and high frequency. I chose the low frequency (125KHz) combination of chip and reader because they don’t need batteries and are a lot cheaper. The drawbacks are that they need to be very close to the scanner to be read, and information-wise, only hold a number, and can’t be reprogrammed. Since this was connecting to Quick Base, that’s not a big deal- because of the relational structure of the tables, as long as the scanned values are unique, it can be linked to a chicken, and therefore all other information about that chicken.

There is also low-frequency RFID that operates at 134.2KHz, that would allow you to write information to, and some of which are compatible with the chips that are put in pets for identification, and hold more information. Since I had very little idea of what I was doing and if this would even work, I opted for the cheap ones.
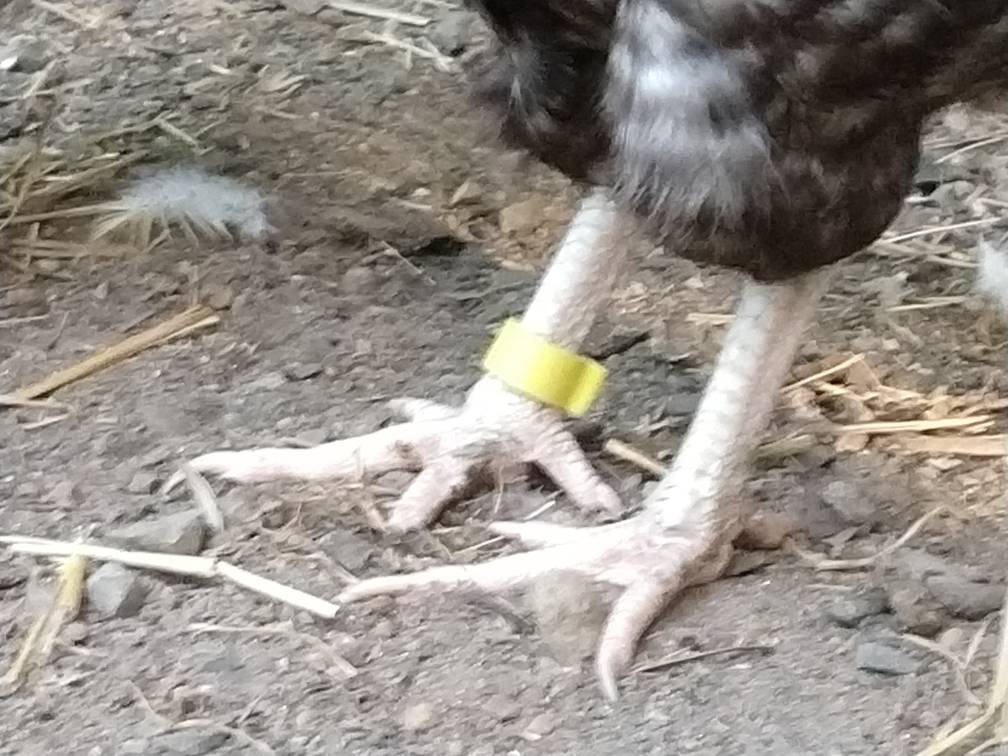
I ended up finding that leg bands with varying types of RFID chips were common on AliExpress.com. I also noticed that generally, they were only available in lots of 20+, the price per each dropping with increase in lot size. There were also many different sizes of bands for different types of fowl, and often the images made it hard to determine what size bird they were for. So after some agonizing over product descriptions to get the right frequency, band size, lot size, and price, I ended up getting 100 for about $27.00. (For the record, my chickens are full-size, and of breeds that are on the larger side, so the bands with an inner diameter of about 17-19mm (11/16″-3/4″) fit pretty well for them.)
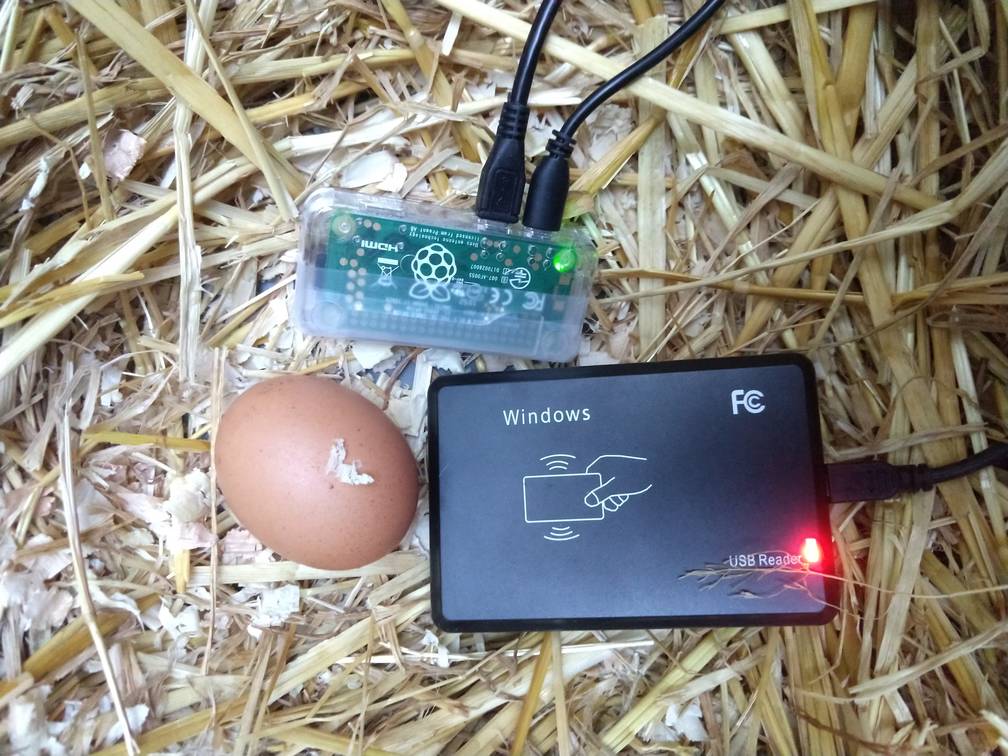
I also found a seller offering cheap USB scanners that read 125KHz and were right around $5. Very similar ones can also be found on Amazon, though for anywhere between $10 and $25. It says Windows on it, but worked with no issue on Windows and Raspian Linux, which is on the Pi.
While the RFID stuff was in transit, I had time to prepare the Quick Base Chicken Tracker app to incorporate the RFID scans. I created a table of all of the RFID tags, and a table for scanner entries, and linked each chicken to an RFID number, so that when one was scanned the entries table would “know” who the chicken was.
Raspberry Pi Setup
The Raspberry Pi Zero W is the brains of the operation. It’s about $15 by itself, or there are kits on Amazon with a power cable and case for about $26. Make sure it’s a Pi Zero W, the W means built-in wifi, which is important because it only has 2 micro USB ports, which are used up by the power cable and the RFID scanner. On the Pi Zero is the standard Raspian Jesse operating system.
Next, I wrote a simple Python script that, when a number is typed in, it goes to my Quick Base account using the API and adds a record in a table for scans from that specific scanner. It doesn’t open a browser window when it does it, but rather just sends the command then loops back and waits for another number to be entered. Since it was running out in the barn with no keyboard or monitor, there was a .desktop file to configure in Linux to make the python script run at startup in a console window. If you were to plug a monitor into it while it runs, you’d see a window with a blinking cursor just sitting there, awaiting input. Probably not the most elegant solution, but it works. I also programmed one of the RFID tags to run a shutdown command if it’s scanned, to safely turn off the Raspberry Pi if it needs to be moved. The code that worked for me is below. Please note that it is for Python 2.7, and will not work in Python 3.5 or above because usage of urllib changed between 2.7 and 3.5. For 3.5, urllib.request must be used.
#goodgrange Chicken Tracker RFID Scan Logging v 0.13
### This version is for python 2.7
# use webbrowser to see API response for debugging.
# import webbrowser
import urllib
from subprocess import call

run = True

def awaitScan():
    scannedCode = raw_input('chickenRfid: ')
    strippedCode = scannedCode.lstrip("0")

    #Elements required for the QB API call
    #Replace QB_BaseURL, QB_DBID, QB_Apptoken, and QB_AppUsertoken with the actual values (omitted for security reasons)
    qbUrlRoot = 'https://QB_BaseURL/db/'
    qbDbid = 'QB_DBID'
    qbAppToken = '&apptoken= QB_Apptoken'
    qbUserToken = '&usertoken= QB App_Usertoken'
    qbApi = '?a=API_AddRecord'
    qbParams = '&_fnm_scannedRfid=' + strippedCode

    #Builds the full url for the QB API call using the above variables.
    fullUrl = qbUrlRoot + qbDbid + qbApi + qbAppToken + qbUserToken + qbParams

    # use webbrowser to see API response for debugging
    # webbrowser.open(fullUrl)

    # replace below number with RFID to use to safely turn off
    if (scannedCode != '1250053'):
        urllib.urlopen(fullUrl)
    else:
        #raise SystemExit
        call("sudo nohup shutdown -h now", shell=True)

while run:
    awaitScan()

With the code loaded on to the Pi, connected to WiFi, and creating a record for each scan, it was time to put the scanner in the nest box to find out who was potentially laying eggs and when. It’s also a confined space where I thought the low-frequency RFID would work well enough.
Now that everything was set up, connected to the network and seemingly working, it was time to put the bands on the chickens. They were relatively easy to get on, and once released the chickens would peck and investigate it, but seemed to get used to it quickly.
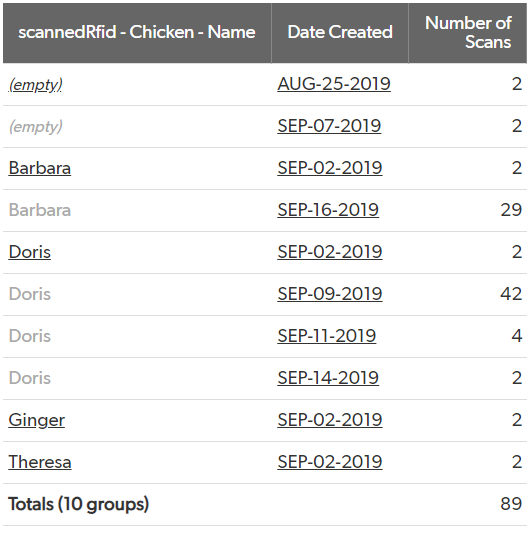
Over the next few days of anxiously awaiting email notifications of scans, I finally got about 40 one morning over the course of about 45 minutes, all from the same chicken.

I’ve had some luck so far, but have been looking into a more powerful scanner that would ensure scans without the RFID chip needing to be so close to the scanner. (Since putting in the scanner I’ve also found a couple of bushes the chickens have been laying eggs under since they have the run of the yard in summer, but with winter coming they should be laying more inside). I’d also like to add more scanners in various locations, but that may depend on what can be done to find a scanner that could read at a longer distance.
I also need to find a better way to display some of this data, especially if its coming from multiple scanners. I’m thinking a summary type table that would group by location and calculate duration to show how long a chicken was in a given spot over the course of a day. A way to detect if an egg is actually laid, and automatically log that in the egg table for the correct chicken is also a future addition once the best way to do that is figured out. Ultimately, it’d be cool to have scanners that could also track various spots to get an idea of how they spend their days, and know when they’re all inside for the evening and automatically close the coop door for the night.
Next Steps
- There have been instances where the Raspberry Pi doesn’t have internet connection due to WiFi extender issues, so local storage of scan data would be a plus. Perhaps daily uploads to a cloud storage folder which Quick Base can monitor and update itself when the file is uploaded.
- Fix WiFi issues and connect more Pi’s.
- Find more ways to display and interact with the QB database from the web.
- More scanners and (so the roosters can be banded and tracked too).
- Incorporate cameras or other sensors (weight?) attached to the Pi to detect whether the nest time resulted in an egg being laid.
- Modify the Python code to add additional functionality to test and admin RFIDs.
- More chickens!
- Find other uses for RFID tracking and more inferences from data collected.
Note: The chicken scanner is currently undergoing development improvements; below is a once-live updated list of the latest scans:
